YODA SOCCER TUTORIAL
how to do a custom kit
The charset
What is this..
Charsets are in Yoda Soccer PNG files
containing all the sprites of a player. In the new beta 0.70 we can insert
custom charset for every team (up to 5 for each one).
Drawing it
To draw a custom charset, you must have a
good graphic editor like Adobe Photoshop or Paint Shop Pro (or similar tools):
doing it with MS Paint could be problematic.
In this tutorial we'll do a sprite of (a bad made) Arsenal kit
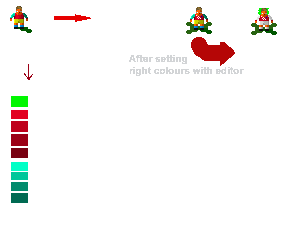
Step 1 - Open one of the PNG files stored in the folder /images/players (in this
situation, sleave.png)
Step 2 - Edit it as explained in this example

Step 2 bis - You can also edit it
using other colours, but they'll be fixed (not changeable in the editor). This
will increase kit realism but will amount the number of the files you'll need
DON' T TOUCH THE HAIRS AND THE SHADOWS
Saving and inserting it
After you've finished the draw, you must save
the PNG file into the folder /images/players/custom/(nation)/
saving it with it's ID number (you can find it opening the data with the notepad)
For the same example, if we must insert Arsenal kit, we must open Notepad.exe,
go in Yoda/data and open the file team_eng.yst. View which number has Arsenal
team (chould be 000), then you can save it as:
000_0_arsenal.png
The name of the team it's not necessary, the main thing are the numbers, so you
can save it as 000_0 also.
The last number is the number of the shirt, if you put zero, Yoda will apply the
charset for every of the five shirts (changing only the colours). If you'll put
number 1 instead, Yoda will apply the charset only for home kit, 2 only for the
away, 3 only for the third and so on..
The menu kits
Menu kits (in the kit selection and editor)
also can be edited and assigned. The process is the same, only you must work
with the files contained in the folder images/kits.
This model of kit is a my drawing started from shirts made by Sipovich of
www.colours-of-football.net
